1. Installation
Get the zip file from the site where you purchased the preset. You can unzip this using WinRAR, 7-zip, or Bandizip.
Copy preset file to: This PC > Documents > Adobe > After Effects (Your version) > User Preset.
If After Effects is already running, please close it completely and launch it again.
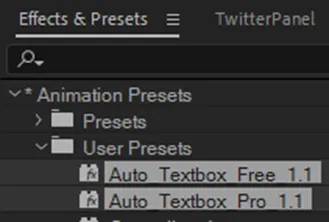
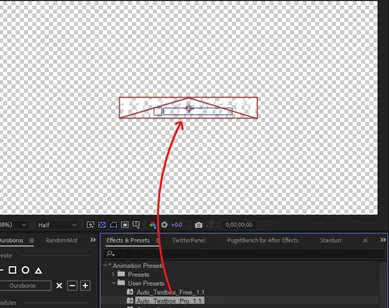
After After Effects is turned on, you can find it under
"*Animation Presets > User Presets" in the
Effects & Presets panel.
2. Before Use
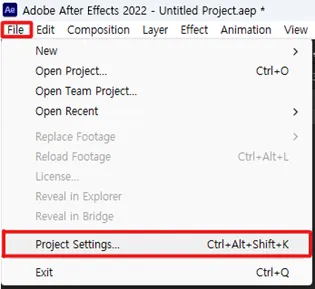
You must change scripting engine to ‘Legacy Extendscript’. To change this, in the 'File' menu click on the second 'Project Settings' from the bottom to open it.
Then go to Expressions and select ‘Legacy ExtendScript’.
3. Apply Preset
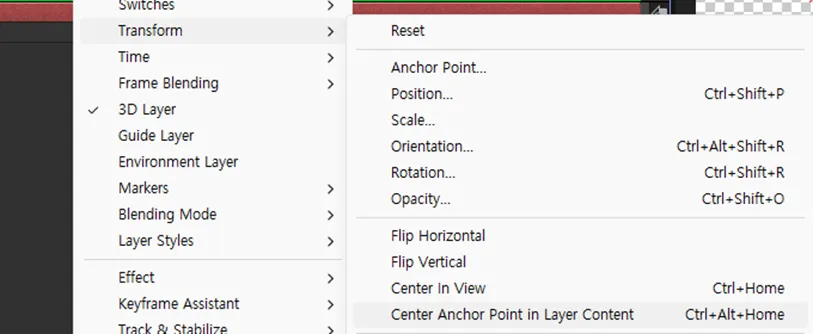
Create a text layer or use existing text layer. Then set anchor point to center of text layer (Ctrl+Alt+Home or Right click layer > Transform > Center Anchor Point in Layer Content).
If you want to use a custom Anchor Point, you can skip this step.
If the text alignment is not 'Center text', temporarily change the alignment to 'Center text'. After aligning the Anchor Point to the center in the above method, you can apply the previously set alignment.
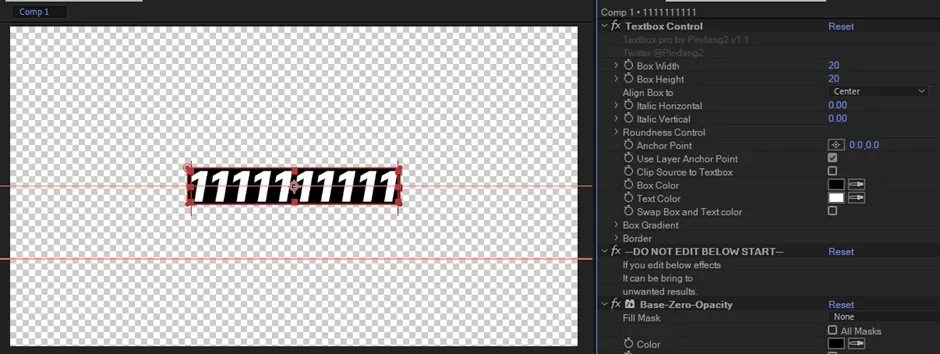
Drag and drop the preset onto the layer. Alternatively, with the layer selected, double-click the preset or use the FX Console like to apply the preset as you like.
Ta-Da! Preset applied.
4. Features Guide
Free version has very reduced function but lightweight. If you do not need the features of the Pro version, I recommend using the Free version.
To summarize the features of the Free version: https://youtu.be/oLcpK4BIDyQ
The Pro version is a version that adds some useful features to the Free version. I think most of the text boxes imagined through the Pro version can be produced.
If you want to see the features supported in the Pro version at a glance, please watch the following video: https://youtu.be/eaOSOzfA8sk

